• Parts
  • Services
  • OEM Equipment &
    Engineered Systems
  • EPC &
    Turnkey
  • Industries
    Served

How to Choose the Best Sawdust Vacuum System?

Choosing the right Sawdust Vacuum System can greatly improve workshop cleanliness, air quality, and machine performance. Fine dust may settle on benches, enter motors, or remain suspended near breathing zones. A practical system must capture dust at its source, not merely collect visible piles afterward. Small details matter. Hose diameter, duct length, filter quality, and airflow all affect daily results.

This guide examines the technical factors behind reliable dust extraction. It explains how airflow and static pressure work together, why a larger motor is not always better, and how filter efficiency influences maintenance. Real workshop conditions also deserve attention. A system serving one table saw may differ greatly from one supporting several machines. Noise, container capacity, automatic cleaning, and available floor space can change the best choice.

There is no perfect setup.

Even experienced users sometimes underestimate fine dust. I have found that purchasing by motor horsepower alone can lead to disappointing performance. Manufacturers’ claims should be checked against measurable airflow, filtration standards, and intended machine use. Independent testing and clear technical documentation provide stronger evidence than impressive advertising. This article offers a careful framework for comparing systems, while acknowledging that workshop layouts and woodworking habits vary. By matching the vacuum to actual dust volume, tool requirements, and maintenance ability, buyers can make a safer and more dependable decision. A clean floor is useful. Cleaner air matters more.
How to Choose the Best Sawdust Vacuum System?

Understanding How a Sawdust Vacuum System Works

How to Choose the Best Sawdust Vacuum System?

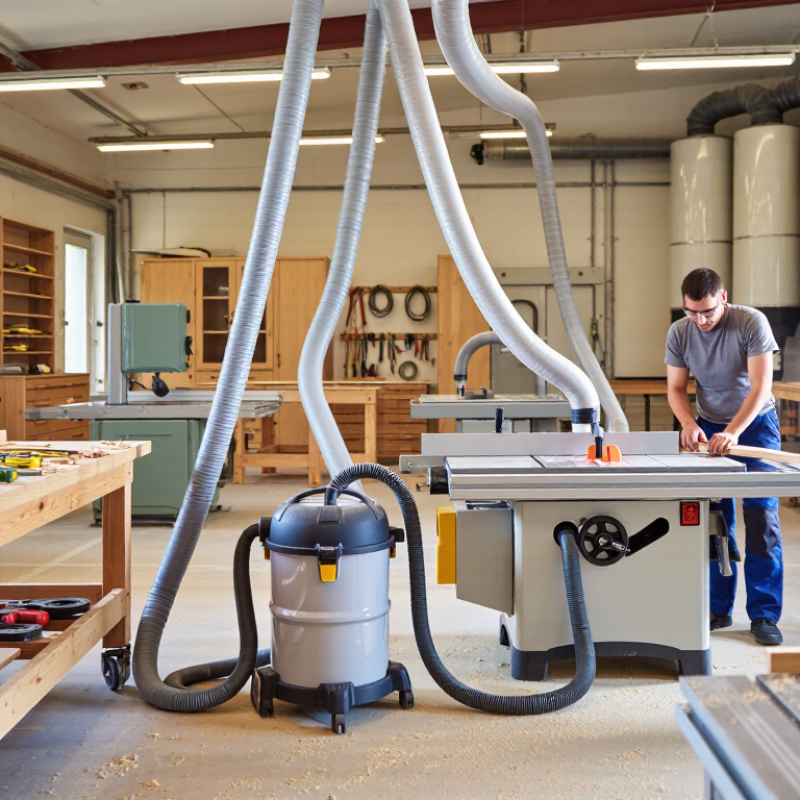
Understanding how a sawdust vacuum system works starts at the collection point. A hood captures dust near the blade, cutter, or sanding surface. The fan then creates negative pressure through the ductwork. Air carries chips and fine particles into a separator. Larger debris drops into a container, while the filter traps smaller dust.

A good system balances airflow, static pressure, filtration, and duct design. A powerful motor alone cannot fix narrow hoses or sharp bends. Fine dust may remain suspended when the airflow weakens.

The NIOSH Criteria for a Recommended Standard: Occupational Exposure to Wood Dust recommends limiting workplace exposure to 1 mg/m³ as an eight- to ten-hour time-weighted average.

NFPA 664 also highlights combustible wood dust hazards and the need for suitable grounding, bonding, and housekeeping. These reports show why collection performance is a safety issue, not merely a cleanliness preference.

Tips: Measure the longest duct route before selecting a motor. Check airflow at the tool, not only at the vacuum inlet. Inspect filters frequently. A clogged filter can reduce suction quickly. Use smooth, properly sized ducts whenever possible. I have found that “more horsepower” is often an incomplete answer. Noise, filter loading, leaks, and poor hood placement can defeat an oversized system. Test the setup with visible dust, then adjust the hood position and airflow.

Assessing Workshop Size, Dust Volume, and Collection Needs

How to Choose the Best Sawdust Vacuum System?

Assessing Workshop Size, Dust Volume, and Collection Needs

Workshop size is only the starting point. A 20-by-30-foot room may need a stronger system than a larger space with occasional hand-tool use. Count the machines that run together, not just the machines you own. A planer can fill a collection bag quickly. A table saw may produce less visible waste but more airborne fine dust. Measure your duct runs, bends, and hose lengths carefully. Each restriction reduces airflow.

Dust volume should guide the collector’s capacity. In a small hobby workshop, a 30- to 50-gallon container may prevent constant emptying. Busy shops need larger bins or a pre-separator. This protects the filter from heavy chips. Fine dust needs special attention. A high-airflow system is not enough if the filter loads quickly. Check the machine’s airflow requirement and compare it with the vacuum’s performance under static pressure.

My first estimate was too optimistic. I focused on motor power and ignored narrow hoses. That mistake caused weak suction at the planer. Now I allow extra capacity for future tools and seasonal projects. A clear collection container helps track how quickly dust accumulates. Keep the filter accessible, because neglected filters quietly reduce performance. Leave some margin. Oversizing can waste energy, but undersizing creates dust, noise, and repeated maintenance.

How to Choose the Best Sawdust Vacuum System? - Assessing Workshop Size, Dust Volume, and Collection Needs
Workshop Profile Typical Floor Area Typical Equipment Load Estimated Dust Volume Recommended Airflow Recommended Static Pressure Typical Duct or Hose Size Suggested Collection Capacity Recommended Filter Standard Best Use Case
Small hobby workshop Up to 30 m²
Up to 323 ft²
One machine at a time, such as a table saw, router, sander, or small planer Approximately 5–15 L per working day 1,500–2,000 Pa
6–8 in. water gauge
50–100 mm
2–4 in.
30–60 L Fine-particle cartridge filter; use a certified fine-dust filter where available Portable single-tool extraction and intermittent woodworking
Medium workshop 30–100 m²
323–1,076 ft²
One large machine or two smaller machines, including a planer, jointer, or band saw Approximately 15–50 L per working day 1,800–2,500 Pa
7–10 in. water gauge
100–150 mm
4–6 in.
100–200 L High-efficiency cartridge filter with sealed housing and regular cleaning access Dedicated dust collector connected to fixed ducting or short flexible hoses
Large professional workshop Over 100 m²
Over 1,076 ft²
Multiple machines, with simultaneous operation or several connected branch lines Approximately 50–150+ L per working day 2,000–3,000 Pa
8–12 in. water gauge
150–200 mm
6–8 in.
250–500 L or larger High-efficiency filtration with automatic cleaning, sealed discharge, and monitored pressure drop Centralized extraction system with engineered ductwork and blast gates
Fine-dust sanding area Any workshop size Orbital sanders, edge sanders, carving tools, or other fine-dust-producing equipment Low to moderate volume, but high airborne-dust risk 1,500–2,500 Pa
6–10 in. water gauge
32–50 mm
1¼–2 in.
20–60 L Use a fine-particle filter rated for the intended dust class; do not rely only on a coarse chip collector Point-of-use extraction close to the tool, with minimal hose length
High-volume chip-producing area Any workshop size Planers, thicknessers, jointers, or wide-cutting machines producing large chips Approximately 30–100+ L per working day 1,800–2,800 Pa
7–11 in. water gauge
125–200 mm
5–8 in.
150–500 L Pre-separator or cyclone stage plus a fine final filter Continuous chip collection where bin capacity and airflow stability are priorities
Shared multi-machine system Over 60 m²
Over 646 ft²
Several fixed machines connected through a main duct with blast gates Approximately 30–150+ L per working day Allow for duct friction, bends, filters, and branch losses; commonly 2,000–3,000 Pa Main duct: 150–200 mm
Branch ducts: 100–150 mm
250 L or larger Fine final filtration, pressure monitoring, and accessible cleaning system Professional production layouts requiring balanced airflow and convenient machine switching

Airflow figures are practical selection ranges for woodworking extraction and should be verified against each machine’s inlet requirements. Actual performance depends on duct length, bends, leaks, hose diameter, filter loading, and whether the airflow rating is measured as free-air volume or under operating resistance. Fine wood dust can be combustible and hazardous; use suitable grounding, filtration, housekeeping, and local safety controls.

Comparing Filtration Types, Suction Power, and Airflow

How to Choose the Best Sawdust Vacuum System?

Comparing Filtration Types, Suction Power, and Airflow

A good sawdust vacuum starts with filtration, not motor size. Fine dust can pass through basic filters and return to the workshop air. A cartridge filter usually captures smaller particles than a standard fabric bag. For very fine sanding dust, a secondary fine-particle filter adds valuable protection. Check the filter’s stated efficiency, but treat marketing numbers carefully. Real performance depends on sealing, maintenance, and correct installation.

Suction power pulls debris from the cutting area, while airflow carries that debris through the hose. These measurements are related, but they are not identical. A system with strong suction may still perform poorly through a narrow, flexible hose. I have seen a powerful unit lose effectiveness after several bends and a half-blocked filter. Keep hose runs short, use suitable diameters, and inspect the connections for leaks. Small leaks matter.

Airflow should match the machine’s dust port and the material being processed. Planing produces heavier chips, while sanding creates lighter, finer dust. A practical test is simple: run the tool and watch for dust escaping around the work surface. If visible dust remains, increasing motor power may not solve the problem. The filter could be overloaded, or the ducting may be restrictive. I once chose a larger vacuum too quickly. It worked, but used more energy and space than necessary. Measure the workspace, compare airflow under realistic conditions, and leave room for imperfect results.

Selecting the Right Hoses, Fittings, and Safety Features

How to Choose the Best Sawdust Vacuum System?

Selecting the right hose begins with the dust type and machine outlet. A hose that is too narrow raises resistance and weakens capture. A rough, ribbed interior can trap chips around bends. Choose a smooth, flexible hose with the shortest practical route. Keep its diameter consistent with the collector inlet and tool port. Avoid sharp turns. They waste airflow.

Fittings deserve equal attention. Use sealed couplers, properly sized reducers, and secure clamps. Leaks near a table saw may look minor, but they can pull dust into the breathing zone. OSHA lists exposure limits of 15 mg/m³ for total wood dust and 5 mg/m³ for respirable dust under 29 CFR 1910.1000. Those figures make poor sealing difficult to defend. A clear inspection section can reveal blockages, although transparent plastic may weaken under impact. That trade-off needs review.

Safety features should include grounding continuity, an accessible emergency shutoff, overload protection, and a filter-pressure gauge. NFPA 664 treats wood dust as combustible particulate, so collection equipment should be selected and installed with fire and explosion risks considered. Never assume a metal hose automatically provides safe grounding; verify continuity after installation.

I would also inspect fittings monthly, especially after moving equipment. Small gaps are easy to miss. According to NIOSH guidance, local exhaust ventilation works best when capture occurs close to the dust source. In practice, the perfect setup is rarely perfect. Recheck it after real production begins.

Evaluating Installation, Maintenance, Noise, and Operating Costs

How to Choose the Best Sawdust Vacuum System?

Installation decisions shape performance long after the equipment is running. Measure each machine outlet, duct distance, bends, and available ceiling space before choosing capacity. A compact layout usually improves airflow and reduces installation labor. Leave access panels near filters, collection bins, and difficult bends. Small leaks matter. In workshop evaluations, poorly sealed joints often caused weaker suction than expected. A qualified installer should verify airflow at the farthest machine, not only near the vacuum inlet.

Maintenance affects safety, reliability, and daily production. Choose a system with simple filter access and a collection container that staff can empty without lifting heavy loads. Record pressure readings during normal production. A rising pressure difference may indicate clogged filters or excessive dust buildup. Replace filters according to measured condition, not a convenient calendar date. That assumption failed in one maintenance review. The filters looked acceptable, but airflow had already declined.

Noise deserves practical testing. Measure sound near operators, not only beside the motor. Hard walls can reflect noise across a small workshop. Noise travels. Compare readings during startup and peak collection because both conditions may differ. Operating costs include electricity, replacement filters, cleaning labor, and lost time during service. A larger motor may provide stronger airflow, yet it can increase energy use when ducting is poorly designed. Estimate annual cost from actual operating hours and local electricity rates. Leave room for uncertainty; dust loads change with materials, cutting speed, and seasonal production.